Showing posts with label embossing folders. Show all posts

Thursday, July 25, 2013

Some of my Organized Swaps I Created for Convention

I knew that I had a lot on my plate this summer, so I decided to focus on a few organized swaps instead of making a lot of general swaps.  I love Stampin' Addicts, so I signed up for three of their swaps.  I even added my own Project Life swap to their list, which I will post tomorrow.  Here are my samples:

One Layer Swap - Boy... This one was a little tricky!
Materials used:  Zoo Babies Stamp Set - Clear, Block D, Alphabet Press Embossing Folder, Square Framelits (I used the 5th one in - 2 1/2"), Smoky Slate Ink Pad, Crisp Cantaloupe Marker
Directions/Hints:  Cut out the square first and then use the embossing folder.  Stamp the image through the cut out square.
Masculine Card Swap
Materials Used:  Simply Stars & You're Amazing Stamp Sets; Pacific Point Cardstock, Ink Pad, and Marker; Always Artichoke Cardstock and Marker; Cajun Craze Cardstock and Marker; Very Vanilla Cardstock; Regal Dots (Always Artichoke); Apothecary Framelits; Mini Silver Brads; Dimensionals
Christmas Tag Swap
Materials used:  Ornaments Keepsakes and Itty Bitty Banners Stamp Sets; Basic Black Cardstock, Marker and 1/8" Taffeta Ribbon; Modern Medley Designer Series Paper; Very Vanilla Cardstock; Real Red Ink Pad, Marker and 1/8" Taffeta Ribbon; Holiday Ornaments and Bitty Banners Framelits; Basic Pearls Large; Dimensionals
Directions/Hints:  Remember that these framelits and stamp sets are available online.  You can type in the names in the search bar on my website to find them.

Thanks so much for looking!  Feel free to comment and/or pin away.  :)  Have a great week!
Tammi

Sunday, April 28, 2013

Cute Card and Notepad using Products from Upcoming Stampin' Up! Catalog!

I was lucky enough to spend last Saturday with my mom and sister at the Stampin' Up! Salt Lake City Regional.  We had so much fun!!  There were FREE stamp sets, make-n-takes and awesome demonstrations.  It was a blast! 

Here are two of the projects we made using our new stamp sets, Simply Stars and Remembering Your Birthday.  You can purchase these items beginning June 1st!
Simply Stars Notepad designed by Stampin' Up! and created by Tammi Verbarendse
Materials (Bold from New Catalog):  Simply Stars and Remembering Your Birthday stamp sets; Whisper White cardstock; Basic Gray cardstock and ink pad; Gumball Green cardstock and ink pad; Pool Party ink pad; Crisp Cantaloupe ink pad; Calypso Coral cardstock and baker's twine; Paper Snips

Worth Celebrating Card and Envelope designed by Stampin' Up! and created by Tammi Verbarendse
Materials used:  Remembering Your Birthday stamp set; Whisper White cardstock and envelope; Basic Gray marker and ink pad; Pumpkin Pie cardstock; Polka Dot Parade Designer Series Paper (Pumpkin Pie & Old Olive); 2012 - 2014 In Color Designer Series Paper Stack (Raspberry Ripple); In Color Dahlias (Raspberry Ripple); Dotted Scallop Ribbon Border, Itty Bitty Shapes Punch Pack (circle for ticket looking punch), and Elegant Butterfly Punches; Modern Mosaic Embossing Folder; Deco Labels Collection Framelits; Paper Snips; Dimensionals

Worth Celebrating Card designed by Stampin' Up! and created by Tammi Verbarendse

Worth Celebrating Card designed by Stampin' Up! and created by Tammi Verbarendse
Closer look at the layers.
Hopefully I didn't miss anything!  We will probably make something like the notepad at my New Catalog Open House, so keep checking back for details!

Happy stamping!!
Tammi

Thursday, November 15, 2012

Exciting Limited Time offer from Stampin' Up! and Sizzix


Check out the video above to learn more about the Texture Boutique embossing kit.  There are a limited number available, so click on my 'shop now' button to place your order!  You have two options:

Texture Boutique Bundle
Item 132700
$39.95 (a $45.85 value)
Includes
  • Texture Boutique Embossing Machine, 1 Pair of Standard Embossing Pads, 1 Mylar Shim
  • Flower Garden Textured Impressions Embossing Folder-Stampin' Up! exclusive
  • Stripes Textured Impressions Embossing Folder-Stampin' Up! exclusive
Texture Boutique Embossing Machine
Item 132657
$29.95
Includes
  • Texture Boutique Embossing Machine, 1 pair of Standard Embossing Pads, 1 Mylar Shim
Happy Shopping!  Now I have to go back to studying!  ;) 
Tammi

Thursday, August 30, 2012

Affection Collection #1 Friend Card

I finished my second card for my swap yesterday and got them in the mail.  Woo, hoo!  There are two days to spare.  ;)  I wanted to use my Affection Collection set we were given at Convention, so I thought it would look really cool with the Vintage Wallpaper Embossing Folder.  Stampin' Up! is still having some issues with their new Basic Black Ink Pad smearing on Whisper White and Very Vanilla cardstock, so I chose to use my Jet Black Stazon pad to stamp the main image.  The only problem was that it really needed to be re-inked!  I decided that I actually like the lighter image, since it added to the vintage feel of the card.  I did use the Basic Black pad to sponge around the edges of the Very Vanilla cardstock and First Edition Specialty Designer Series Paper.  Let me know your thoughts!  I will be demoing this card during the month of September, so contact me if you want to book a fab party!
#1 Friend card created by Tammi Verbarendse
Supplies:  Affection Collection Stamp Set, Basic Black Ink Pad and cs, Cherry Cobbler Ink Pad and cs, Very Vanilla cs, First Edition Specialty dsp, Jet Black Stazon Pad, sponge, 3/16" Neutral Brads, Basic Pearls, Dimensionals, Labels Collection Framelits, Modern Label Punch, Vintage Wallpaper Embossing Folder, Big Shot
This will also be one of the card samples I will send you, if you sign up as a demonstrator through my website (click the 'join now' button on the left) by Friday, August 31st!
Happy Stamping!
Tammi

Saturday, July 14, 2012

Stepped Up Tricky Treats Holder

I finished playing around with my treat holder and I must say, I'm pretty pleased.  My daughter recommended some sparkle, so I found my shimmer paint and used a dauber to highlight the spider web.  I also added a Pumpkin Pie glimmer brad to the top of the tag.  I wanted to raise up the 'Eeek!', so I used the Bitty Banner Framelits and cut out the saying and popped it up with a Dimensional.  Let me know what you think of this stepped up version.


Tricky Treats Halloween Treat Holder by Tammi Verbarendse
Tricky Treats stamp set, Pumpkin Pie Marker & CS, Basic Black Ink Pad and CS, Whisper White CS, Polka Dot Parade DSP, Top Note Bigz Die, Spider Web Embossing Folder, Bitty Banners Framelits, Big Shot, Extra Large Tag Punch, Essentials Paper-Piercing Pack (LOVE this! I cut around the dots with my paper cutter), Paper-Piercing Tool, Dimensionals, Rhinestones Basics, Brights Glimmer Brads, Sponge, Frost White Shimmer Paint, Sponge Daubers

Tricky Treats Halloween Treat Holder by Tammi Verbarendse

Tricky Treats Halloween Treat Holder by Tammi Verbarendse

Tricky Treats Halloween Treat Holder by Tammi Verbarendse
You can now click the 'pin it' button on the bottom of each post to add any image to your Pinterest boards.  You have to click on the actual post and then it will be listed at the bottom of the page.  Please give me credit for any projects you pin.  Thanks!

Now I'm going to work on my last two swaps.  Have a great weekend!
Tammi

Thursday, July 12, 2012

Treat Holder Prototype...

Have you ever thought of something that looked so cool in your head and then as soon as you tried to recreate it, well... let's just say it doesn't turn out like you thought.  I bought these $1 tins from Target and I had these great hopes for them, but the tops are just a little too hard to cover.  So... I came up with another idea.  I bought some yummy sounding Rootbeer Float gum and used the Top Note die to create a cover.  I wanted to use my Tricky Treats stamp set, so I thought the Spider Web embossing folder would be really cool on the front.  Here is the finished project, but I'm still not sure its what I want to go with for my swap... It just seems to need a little something else. 
Halloween Treat Holder created by Tammi Verbarendse
Tricky Treats stamp set, Pumpkin Pie Marker & CS, Basic Black Marker and CS, Whisper White CS, Polka Dot Parade DSP, Top Note Bigz Die, Spider Web Embossing Folder, Big Shot, Extra Large Tag Punch, Essentials Paper-Piercing Pack (LOVE this!  I cut around the dots with my paper cutter), Paper-Piercing Tool, Dimensionals, Rhinestones Basics

Halloween Treat Holder created by Tammi Verbarendse
Let me know your thoughts and I'll tell you tomorrow if I decide to change anything.  I'll be finishing my Over-the-Top card and another Trading Card for my swaps tomorrow, too.  Can't wait until Convention next week!

Tammi

Friday, July 6, 2012

Another fun 3 x 3 Card

Happy Early Halloween!  I know Halloween isn't for over three months, but I couldn't resist buying this stamp set and making this cute mini 3 x 3 card.  This is for another swap I'm in... can you tell I'm a little addicted to stamping and swapping??  I think I signed up for probably 10 organized swaps...  On a very good note, I'm more than halfway finished with them!

Halloween 3 x 3 Card created by Tammi Verbarendse
Tricky Treats Stamp Set, Polka Dot Parade DSP, Basic Black Marker & CS, Whisper White CS, Daffodil Delight Marker and 1/4" Stitched Grosgrain Ribbon, Pumpkin Pie Marker, Designer Frames Folders (Oval & I cut around the embossed image), Extra Large Oval Punch and Dimensionals

Halloween 3 x 3 Card created by Tammi Verbarendse
Trading Cards will be posted tomorrow...
Tammi

Thursday, June 14, 2012

One Layer Flowering Card

I was playing around with my mom's Flowering Flourishes set again and decided to use it on a one layer card.  This is actually hard to do, since you can't add any extra layers to the card!  This set is a great one to use for a semi-quick card.  The most time consuming part was coloring the image with my markers.  I used my Color Coach again for a combo using Wisteria Wonder.  Let me know your thoughts!
One Layer Card created by Tammi Verbarendse
I decided to stick with the layout of my card yesterday, but I took off the pearls on the flowers and it looks better.  Trying to resist adding pearls to the card above!  :) 

Happy Stamping!
Tammi

Wednesday, June 13, 2012

Flowering Flourishes Card

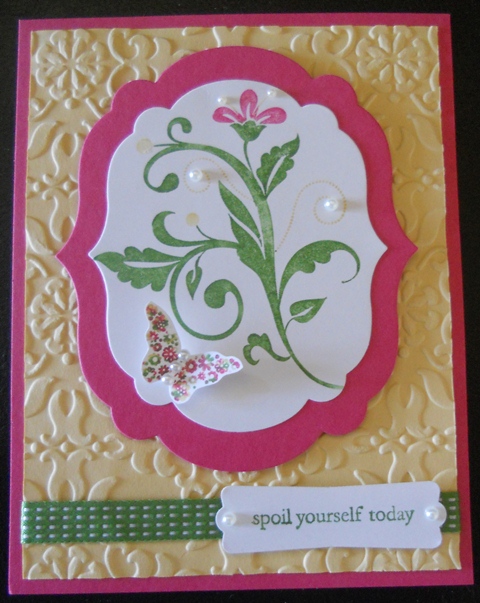
I've been playing around with this new stamp set that I borrowed from my mom.  I got the color combo from the newest cards for our Color Coach.  The Gumball Green works well with Melon Mambo and So Saffron.  I'm still trying to decide if I like the frame-lits that I used to cut out the flower.  I may try another with just a rectangle...  I'll let you know how that turns out.    I may cut back on the pearls on the flower, although they are my favorite embellishment! 
Flowering Flourishes card created by Tammi Verbarendse
Enjoy!
Tammi

Saturday, June 2, 2012

Thanks Big Time Card

Here's a cute card I made for a swap I'm in.  I wanted to use a set that I've had for a while and some of our new items.  I chose Every Little Bit and A Word For You for my stamp sets.  I found a card that my mom designed and thought the layout would be perfect!  I used our new Daffodil Delight Striped Grosgrain Ribbon and Summer Smooches Designer Series Paper. 
Created by Tammi Verbarendse
Enjoy!
Tammi

Thursday, May 10, 2012

Some fun projects

Here is the project I demonstrated at my Stampin' Up! party on Tuesday night.  I love these clear envelope mini scrapbooks!  (Thanks, Stacy for showing me how to make them!)  I created the album first and then created the cover next.  The cover would be really cute as a card, too!  I used the Big Shot to demonstrate the embossing folders and then I had the numbers and letters precut to save time.  I used the Alphabet Simple Numbers and the Timeless Type Junior Alphabet dies.  I love these and am sad that they are retiring too!  You still have until May 31st to order them, unless they sell out before then.
Clear Envelope Mini Scrapbook created by Tammi Verbarendse
Any guesses who may be receiving this in August??  ;)

The next project was their Make-n-Take.  I wanted to keep it very simple, so I used another retiring set, Baroque Motifs.  I gave them the option of adding some texture by using the Square Lattice embossing folder.  Then I had to add some bling!  My favorite item in the catalog is still the Basic Pearls!  I could use them and the rhinestones on EVERYTHING!!  :) 
Created by Tammi Verbarendse
These are two of the projects that will be available to make at my 1st Stampin' Buffet that I am hosting later this month.  You can choose Thursday, May 24th from 5 - 9 p.m. or Saturday, May 26th from 10 a.m. - 2 p.m.  Check back tomorrow for all the projects and how to order.  This will also be available as a kit, so check the Monthly Kit tab on how to order that way.

Happy Stamping!
Tammi

Wednesday, May 9, 2012

Happy Birthday, Grandma Kathy!!

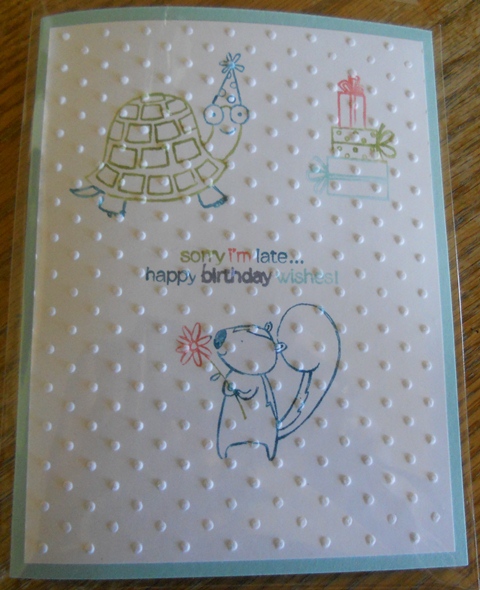
My mother-in-law is celebrating her birthday today, so my son made her a card last night after my Stampin' Up! party.  He really wanted to use the Big Shot and add some texture, so he chose the cute polka dots.  I love the Turtle & Co stamp set and am so sad that it is retiring!  I have a feeling that this will be a set I keep for a while.  As if Dylan would let me give it away!  He had a fun time using my current In Color markers to color the image.  I've trained him so well... he even remembered to huff on the stamps after he was done coloring them.  AND he cleaned them!  What a great kid!  I love the belated birthday saying with the turtle.  I am so bad about getting things in the mail on time!  At least this is proof that we are thinking of Grandma Kathy today and have her card ready.  :) 
Created by Dylan Verbarendse
Check back tomorrow to see some the projects from my Stampin' Up! party last night and to learn about my 1st Stampin' Buffet coming up in a few weeks.  This will also be available as my Monthly Kit this month.  (Yes... I will be starting these again!) 

Happy Stamping!!
Tammi